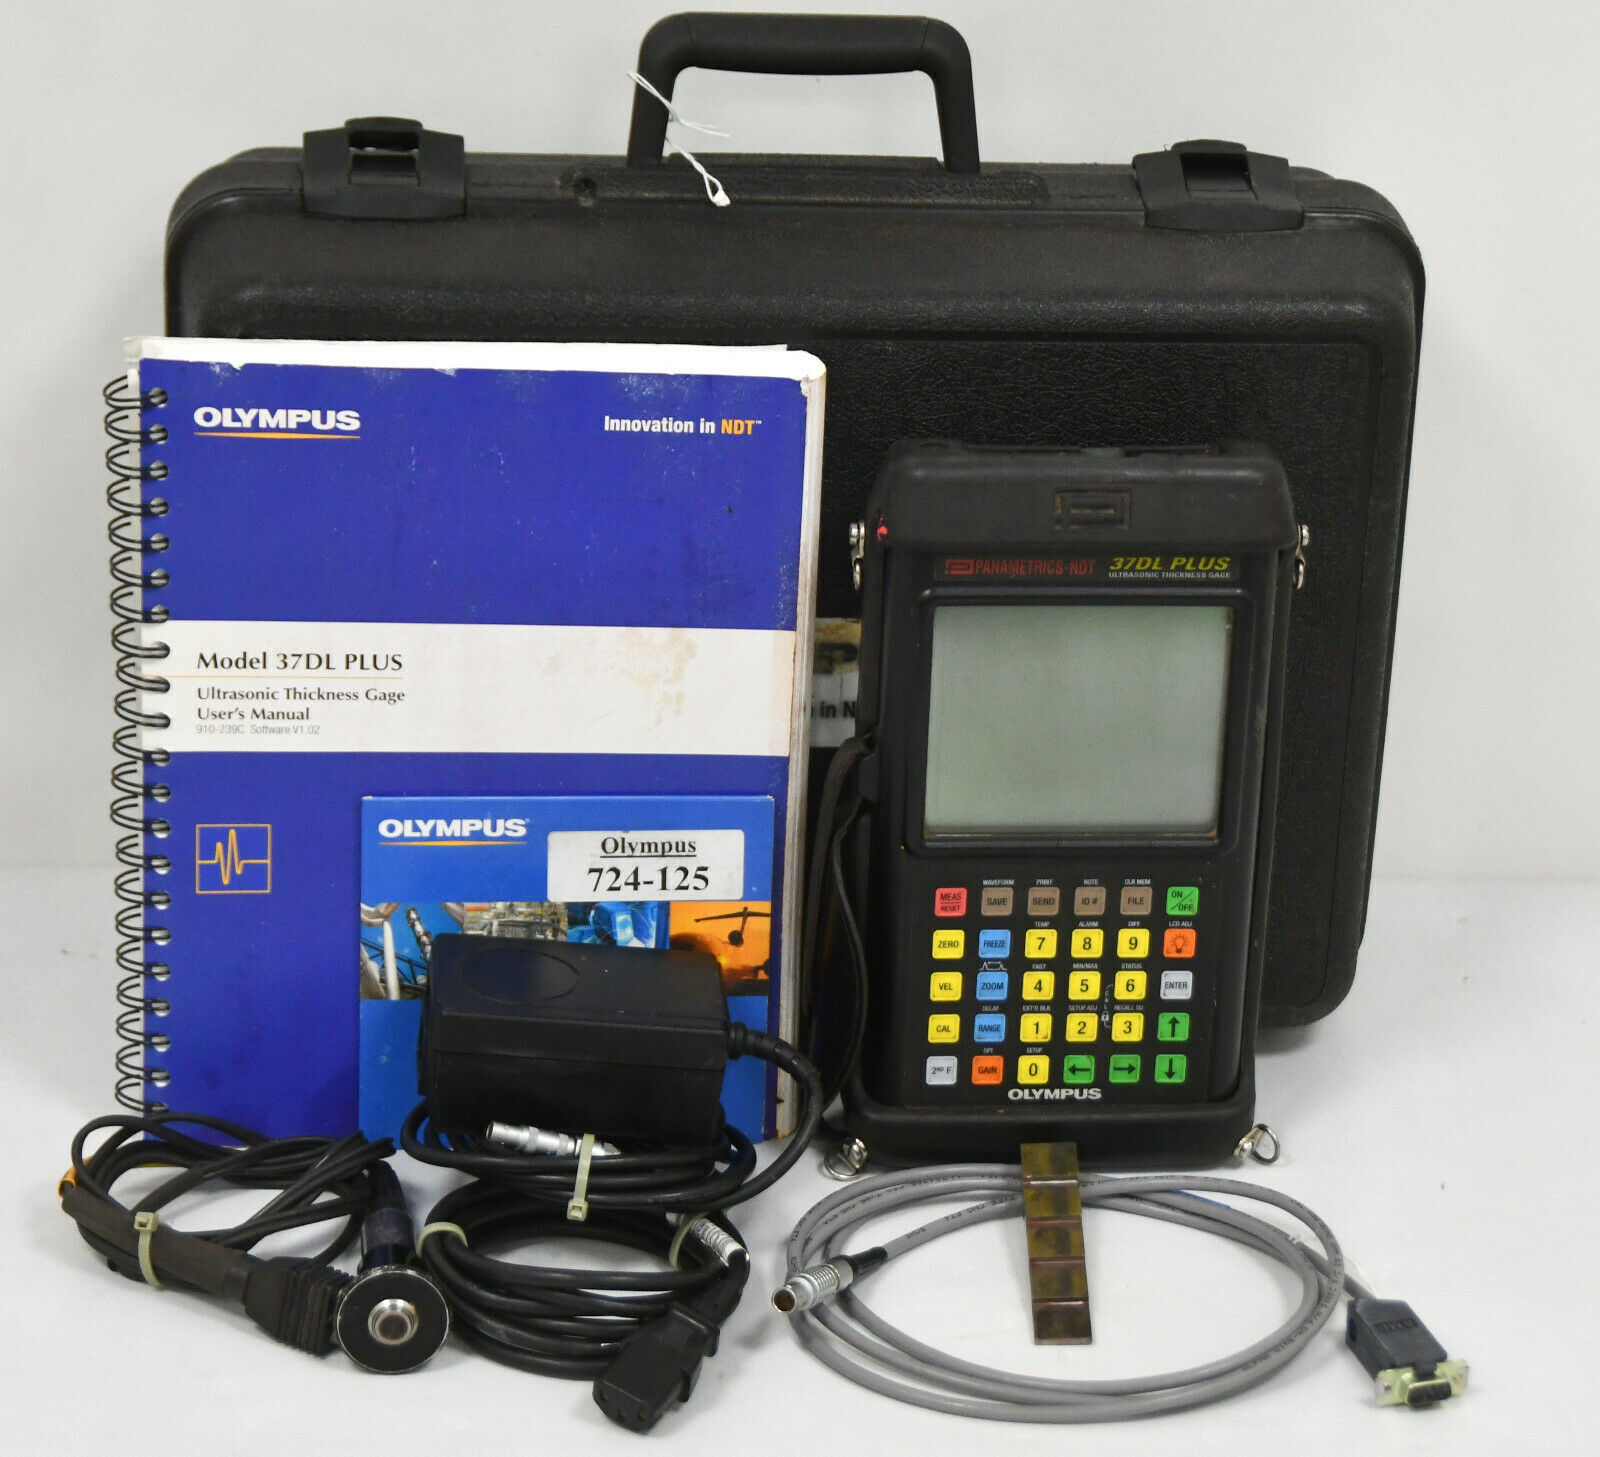
Olympus 37DL Plus Ultrasonic Thickness Gauge
$6,800.00
| Features Olympus 37DL PLUS |
| • Patented Thru-Coat™ technology measures and displays the thickness of the metal part and its coating using a ‘single backwall echo’. • Temperature Compensation feature adjusts the material velocity for changes in material temperature. • Optional Oxide/Scale feature measures and displays the thickness of the steel and the oxide/scale build-up. • Average/Min mode saves the average or minimum of several successive thickness measurements. • A-scan display is brighter with better contrast and visibility. • Uses a vast selection of dual element and single element contact, delay line, and immersion transducers. • EMAT transducers for no-couplant steel thickness measurements through heavily scaled surfaces. • The file-based alphanumeric datalogger can use longer file names (32 character max) and ID numbers (20 character max). • Every thickness reading in a stored B-scan can now be reviewed in the GageView Interface Program and on the gage. • Select to view (Min/Max, Alarm, or A-scan flags) flags for Grid points. • Grid files can be expanded by adding rows or columns or by changing the incrementing direction. |
Description
Olympus 37DL Plus Ultrasonic Thickness Gauge
Olympus 37DL Plus Ultrasonic Thickness Gage
Olympus 37DL PLUS is an advanced nondestructive ultrasonic thickness gage that combines powerful measurement features with sophisticated data acquisition and output capabilities for applications involving pipes, tanks, and other metal structures subject to internal corrosion or erosion. The 37DL PLUS includes many innovative features that simplify true metal thickness measurements even when the exposed surface is coated or painted. The patented Thru-Coat technology measures and displays the thickness of the metal part and its coating using a ‘single backwall echo’. The Oxide/Scale option measures and displays the thickness of the steel and the oxide/scale build-up on the inside of boiler tubes to help predict tube life. Accuracy of high temperature thickness measurements can be improved by using the Temperature Compensation feature that adjusts the material velocity for changes in material temperature. A Average/Min mode saves the average or minimum of several successive thickness measurements.
Olympus 37DL Plus Ultrasonic Thickness Gauge
| Features Olympus 37DL PLUS |
| • Patented Thru-Coat™ technology measures and displays the thickness of the metal part and its coating using a ‘single backwall echo’. • Temperature Compensation feature adjusts the material velocity for changes in material temperature. • Optional Oxide/Scale feature measures and displays the thickness of the steel and the oxide/scale build-up. • Average/Min mode saves the average or minimum of several successive thickness measurements. • A-scan display is brighter with better contrast and visibility. • Uses a vast selection of dual element and single element contact, delay line, and immersion transducers. • EMAT transducers for no-couplant steel thickness measurements through heavily scaled surfaces. • The file-based alphanumeric datalogger can use longer file names (32 character max) and ID numbers (20 character max). • Every thickness reading in a stored B-scan can now be reviewed in the GageView Interface Program and on the gage. • Select to view (Min/Max, Alarm, or A-scan flags) flags for Grid points. • Grid files can be expanded by adding rows or columns or by changing the incrementing direction. |
| Advanced Ultrasonic Corrosion Gage |
| The A-scan display is bright with great contrast and visibility. Every thickness reading in a stored B-scan can be reviewed on the 37DL PLUS and in the Interface Program. The user can select to view (Min/Max, Alarm, or A-scan flags) flags with Grid points. The file-based alphanumeric datalogger can use longer file names (32 character max) and ID numbers (20 character max). Grid files can be expanded by adding rows or columns or by changing the incrementing direction.Transducers The 37DL PLUS can be used with a vast selection of dual element and single element transducers. Its full line of D790 series dual element transducers feature Automatic Probe Recognition to provide maximum gage performance for each transducer. The 37DL PLUS also has the ability to use the E110-SB EMAT transducer for no-couplant steel thickness measurements through oxide-scaled surfaces. The Panametrics M2017 and M2091 transducers are ideally suited for measuring internal oxide/scale build-up on boiler tubes. The 37DL PLUS is also compatible with the complete line of Panametrics Microscan single element direct contact, delay line, and immersion transducers ranging in frequency from 2 to 30 MHz. As a result, the gage can be used for non-corrosion applications involving materials such as plastic, fiberglass, composites, rubber, castings, rubber and glass. Application Auto-Recall automatically recalls 16 default and 10 custom Microscan transducer setups from the gage’s memory. |
Thru-Coat™ technology
This innovative feature uses a single backwall echo to measure true metal thickness. The Panametrics 37DL PLUS can display both metal and coating thickness, each adjusted for their correct material sound velocity. The gage can be set to display only the true metal thickness. There is no need to remove the paint or coating from the surface. Thru-Coat measurements use the new D7906-SM and D7908 dual element transducers
Temperature Compensation
Variations in material temperature cause changes in sound velocity that may affect the accuracy of the thickness measurement. The Temperature Compensation feature allows the user to enter the calibration block temperature and manually input the current (high) temperature at the measurement points. The Panametrics 37DL PLUS will display the temperature corrected thickness that can then be saved to the internal datalogger.
DB Grid View
The improved Grid View feature allows the user to select either a Min/Max, Alarm, or
A-scan flag to be viewed along with each grid point. This allows the user to quickly scan through a file and locate Min/Max, Alarm, or A-scan locations.
Optional Oxide/Scale Measurement
This option uses advanced algorithms to measure the thickness of oxide/scale build-up on the inside of boiler tubes. The gage simultaneously displays the metal thickness of the boiler tube and the thickness of the oxide layer. Knowing the thickness of the oxide/scale helps predict tube life. We recommend the use of the M2017 or M2091 transducer for this application.


